Navigation menu
Category:Metroid Fusion Screenshots
From Metroid Wiki
Media in category "Metroid Fusion Screenshots"
The following 101 files are in this category, out of 101 total.
-
 Aqua Zebesian.png 240 × 160; 34 KB
-
 Arachnus mf Screenshot 1.jpg 240 × 160; 42 KB
-
 Arachnus mf Screenshot 2.jpg 240 × 160; 28 KB
-
 Atmospheric Stabilizer mf Screenshot 1.png 240 × 160; 25 KB
-
 Atmospheric Stabilizer mf Screenshot 2.png 240 × 160; 14 KB
-
 Atmospheric Stabilizer mf Screenshot 3.jpg 240 × 160; 35 KB
-
 Atmospheric Stabilizer mf Screenshot 4.jpg 240 × 160; 30 KB
-
 Atmospheric Stabilizer mf Screenshot 5.jpg 240 × 160; 33 KB
-
 BSL Research Station mf Screenshot 1.png 240 × 160; 29 KB
-
 BSL Research Station mf Screenshot 2.png 240 × 160; 14 KB
-
 BSL Research Station mf Screenshot 3.png 240 × 160; 27 KB
-
 BSL Researchers mf Screenshot 2.png 240 × 160; 34 KB
-
 BSL Researchers mf Screenshot.png 240 × 160; 21 KB
-
 CoreX.png 240 × 160; 14 KB
-
 Diffusion Missile.png 240 × 160; 14 KB
-
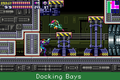 Docking Bays mf Screenshot.png 240 × 160; 11 KB
-
 Evir.png 240 × 160; 36 KB
-
 Fake Chozo Statue mf Screenshot.png 240 × 160; 12 KB
-
 FCS Hard Core-X mf Screenshot.png 240 × 160; 10 KB
-
 FU Missile.png 240 × 160; 15 KB
-
 Fusion Suit mf Screenshot.jpg 240 × 380; 41 KB
-
 Fusion Suit mf Screenshot.png 240 × 160; 16 KB
-
 Fusion Super Missile.png 240 × 160; 20 KB
-
 Fusion title.png 240 × 160; 30 KB
-
 Gold Zebesian mf Screenshot.png 240 × 160; 9 KB
-
 Gunship MF Screenshot 1.png 240 × 160; 13 KB
-
 Gunship mf Screenshot.png 240 × 160; 16 KB
-
 Hornoad mf Screenshot 2.png 240 × 160; 19 KB
-
 Hornoad mf Screenshot.jpg 480 × 319; 16 KB
-
 Kago Nest mf Screenshot 1.png 240 × 160; 12 KB
-
 Kago Nest mf Screenshot 2.png 240 × 160; 13 KB
-
 Kihunter mf Screenshot.png 240 × 160; 16 KB
-
 Main Deck mf Screenshot 2.png 240 × 160; 13 KB
-
 Main Deck mf Screenshot.png 240 × 160; 10 KB
-
 Metroid Fusion MetroidVaccine.png 240 × 160; 18 KB
-
 Missile Tank mf Screenshot.png 240 × 160; 8 KB
-
 Morph Ball Bomb mf Screenshot.png 240 × 160; 16 KB
-
 Moto mf Screenshot 1.png 240 × 160; 18 KB
-
 Navigation Room mf Screenshot.jpg 360 × 312; 15 KB
-
 Navigation Room MF.png 240 × 160; 6 KB
-
 Nettori mf Screenshot.png 240 × 160; 33 KB
-
 Nightmare mf Screenshot 1.png 240 × 160; 20 KB
-
 Nightmare mf Screenshot 2.png 240 × 160; 21 KB
-
 Nightmare mf Screenshot 3.png 240 × 160; 11 KB
-
 Nightmare mf Screenshot 4.png 240 × 160; 19 KB
-
 Nightmare mf Screenshot 5.png 240 × 160; 19 KB
-
 Nova mf Screenshot 1.png 240 × 160; 27 KB
-
 Omega Metroid mf Screenshot.png 240 × 160; 24 KB
-
 Operations Deck mf Screenshot 1.png 240 × 160; 7 KB
-
 Operations Deck mf Screenshot 2.png 240 × 160; 11 KB
-
 Operations Room mf Screenshot.png 240 × 160; 18 KB
-
 Powamp mf Screenshot.png 240 × 160; 23 KB
-
 Pump Control Unit mf Screenshot 2.png 240 × 160; 14 KB
-
 Pump Control Unit mf Screenshot.png 240 × 160; 9 KB
-
 Quarantine Bay mf Screenshot 2.png 240 × 160; 18 KB
-
 Quarantine Bay mf Screenshot.png 240 × 160; 12 KB
-
 Recharge Room mf Screenshot.png 240 × 160; 12 KB
-
 Restrict Laboratory Metroids.png 240 × 160; 9 KB
-
 Restricted Laboratory mf Screenshot 1.png 240 × 160; 13 KB
-
 Restricted Laboratory mf Screenshot 2.png 240 × 160; 10 KB
-
 Restricted Laboratory mf Screenshot 3.png 240 × 160; 14 KB
-
 Restricted Zone mf Screenshot 1.png 240 × 160; 7 KB
-
 Restricted Zone mf Screenshot 2.png 240 × 160; 8 KB
-
 Ridley-X mf Screenshot 1.png 240 × 160; 14 KB
-
 Ridley-X mf Screenshot 2.png 240 × 160; 12 KB
-
 Ripper mf Screenshot 1.png 240 × 160; 23 KB
-
 SA-X mf Screenshot 1.png 240 × 160; 13 KB
-
 SA-X mf Screenshot 2.png 240 × 160; 11 KB
-
 SA-X mf Screenshot 3.png 240 × 160; 8 KB
-
 SA-X mf Screenshot 4.png 240 × 160; 21 KB
-
 SA-X mf Screenshot 5.png 240 × 160; 9 KB
-
 SA-X mf Screenshot 6.png 240 × 160; 18 KB
-
 SA-X mf Screenshot 7.png 240 × 160; 10 KB
-
 SA-X mf Screenshot 8.png 240 × 160; 14 KB
-
 Samus mf Screenshot.png 240 × 160; 21 KB
-
 Save Room mf Screenshot.png 240 × 160; 12 KB
-
 Sciser mf Screenshot.png 240 × 160; 14 KB
-
 Screw Attack Blocks mf.png 240 × 160; 9 KB
-
 Sector 2 (TRO).png 240 × 160; 14 KB
-
 Sector 3 (PYR).png 240 × 160; 29 KB
-
 Sector 4 (AQA).png 240 × 160; 13 KB
-
 Sector 5 (ARC).png 240 × 160; 15 KB
-
 Sector 6 (NOC).png 240 × 160; 13 KB
-
 Security Robot BOX mf Screenshot 1.png 240 × 160; 16 KB
-
 Security Robot BOX mf Screenshot 2.png 240 × 160; 16 KB
-
 Serris mf Screenshot 1.png 240 × 160; 14 KB
-
 Serris mf Screenshot 2.png 240 × 160; 16 KB
-
 Skree mf Screenshot.jpg 240 × 160; 37 KB
-
 Skultera mf Screenshot 1.png 240 × 160; 14 KB
-
 Skultera mf Screenshot 2.png 240 × 160; 13 KB
-
 SR388 mf Screenshot.png 240 × 160; 35 KB
-
 SRX.png 240 × 160; 20 KB
-
 Sub-Zero Containment mf Screenshot 1.png 240 × 160; 20 KB
-
 Sub-Zero Containment mf Screenshot 2.png 240 × 160; 23 KB
-
 Sub-Zero Containment mf Screenshot 3.png 240 × 160; 25 KB
-
 Vaccine Metroid fu Screenshot.png 240 × 160; 27 KB
-
 Waver mf Screenshot.png 240 × 160; 19 KB
-
 Wide Beam mf Screenshot.png 240 × 160; 11 KB
-
 X in Samus fu Screenshot.png 240 × 160; 31 KB
-
 Yakuza mf Screenshot.gif 240 × 160; 10 KB
-
 Zazabi mf Screenshot.png 240 × 160; 26 KB


.png)
.png)
.png)
.png)
.png)


